Update Type:
Update Modifications Only – Modifies only what you are going to change.
Update all Information – Modifies what you are going to change and resends all previously loaded information.
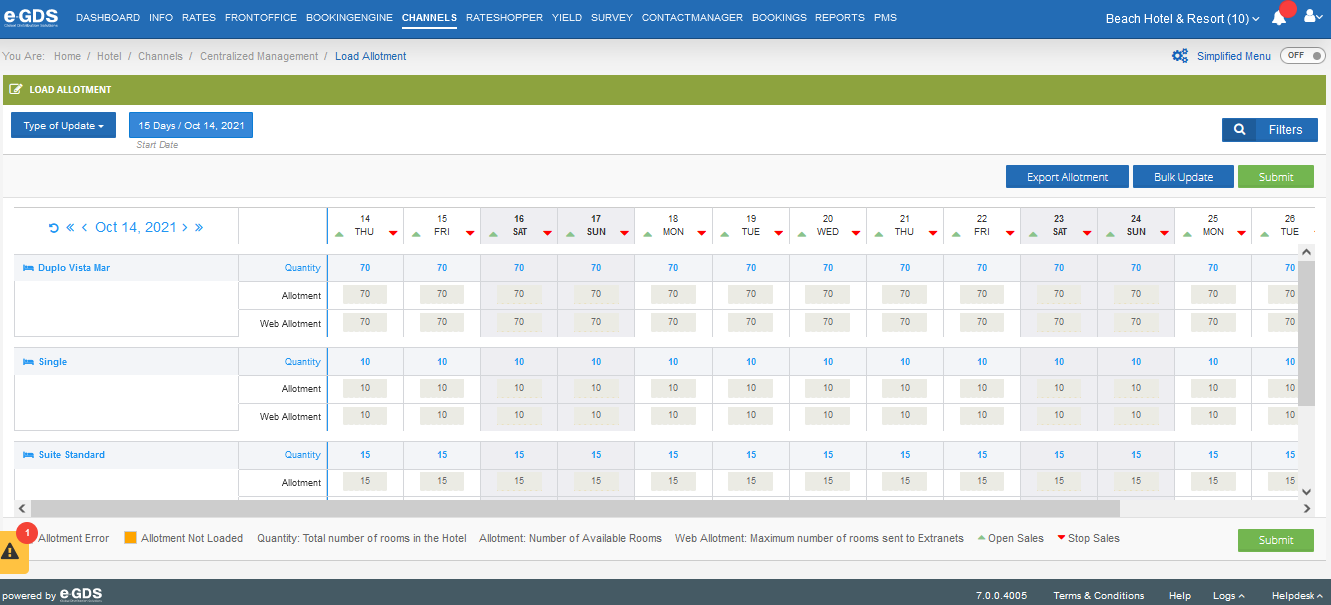
Start Date – You can choose to view the calendar by full month, 15 days or 7 days. After choosing you should “Apply Filters” for the calendar to update to the desired view.
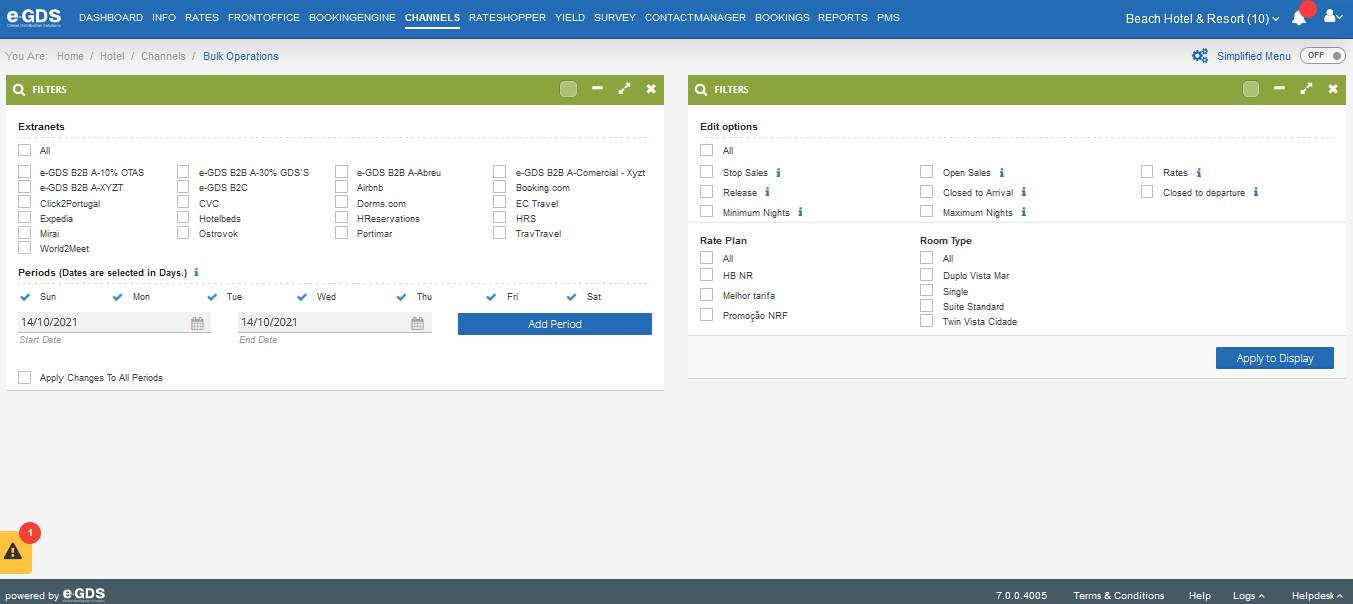
Export Allotment – You have the option to upload allotment using information from other channels. By accessing this shortcut you have access to the following fields:
Extranets – Choose the extranet from which you want to copy the allotment.
Periods – Which period do you want to copy. You must select the Start Date and End Date and “Add Period”. You can add more than one period.
f you wish, you can exclude weekdays from being copied.
Current Period – The period you selected above are visible in this field.
Filters:
e-GDS Regime (Rate Plan) – Select which regime(s) you want to copy the information.
e-GDS Typology – Select which typology(ies) you want to copy the information from.
After applying these filters you must “Submit”.
After submitting you are directed to the Submission History page to confirm the status of the submissions.
Bulk Update – if you want to make a bulk change to the allotment. By accessing this shortcut you are redirected to the tab where you can change the allotment.
Periods – Which period do you want to change. You must select the Start Date and End Date and “Add Period”. You can add more than one period.
f you wish, you can exclude weekdays from being copied.
Current Period – The period(s) you selected above become visible in this field.
Filters:
e-GDS Regime (Rate Plan) – Select which regime(s) you want to change.
e-GDS Typology – Select which typology(ies) you want to change.
After applying these filters you must “Apply”.

After applying the filters, the Overview area becomes active.
Update Type – you must identify what type of update you want to perform.
Update Modifications Only – Modifies only what you are going to change.
Update all Information – Modifies what you are going to change and resends all previously loaded information.
In the table below you will have the room(s) you selected to change and on the right the fields to inform which allotment you intend to give.
Total rooms available – number of rooms you have free for sale.
Total rooms on the web – number of rooms that you want to make available to be put on sale on the online channels.
After making these changes you should “Submit”.

The calendar view of the allotment can be changed by walking with the arrows back or forward, or by clicking on the month, a pop-up appears where you can select the view period.
To change the availability in the calendar itself, simply click on the day and change to the desired quantity. If you want that allotment to be applied to the other days, you must click on the arrow that appears next to the allotment and it will be applied to the other days.
After making allotment changes in the calendar you should “Submit”.

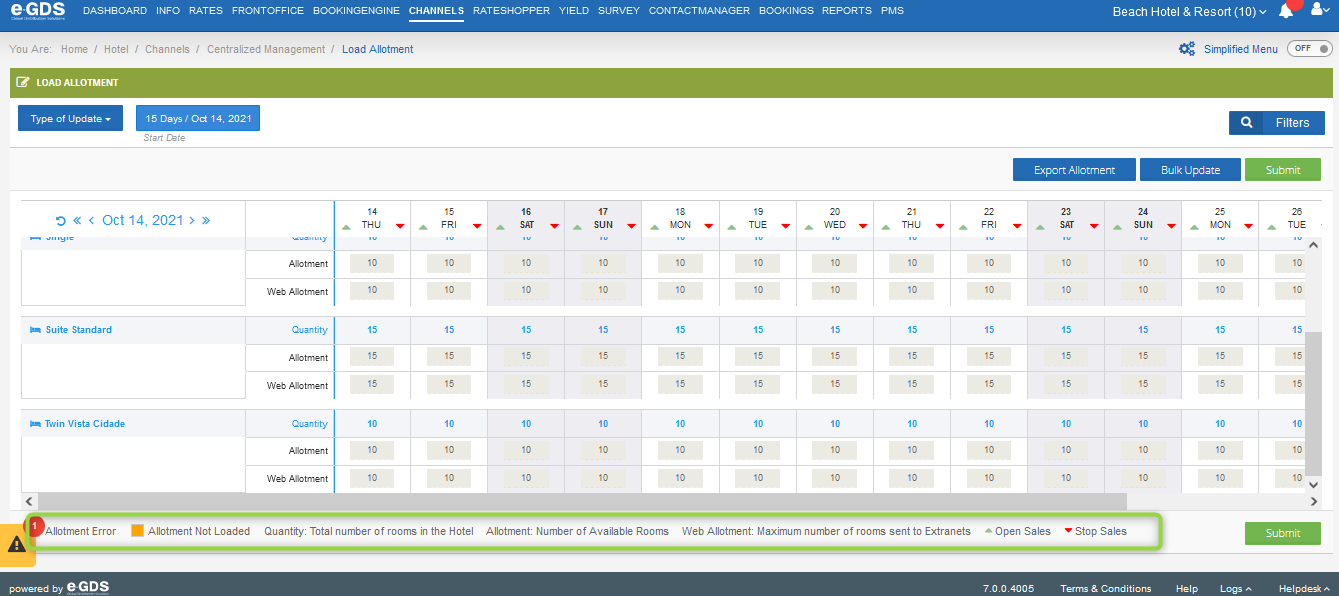
Below the Calendar View, you can find the legends of the colors that appear in the calendar.
Availability Error – When an error is verified when sending the availability.
Availability not sent – The availability has not been sent yet.
Quantity: Total number of Rooms in the Hotel.
Availability: Number of Rooms Available
Online Availability: Maximum number of rooms sent to Extranets.
Open Sales – Opening Sales.
Stop Sales – Closing Sales.

Questions
My Question