In the Schedulers menu the Backoffice displays a table with the columns:
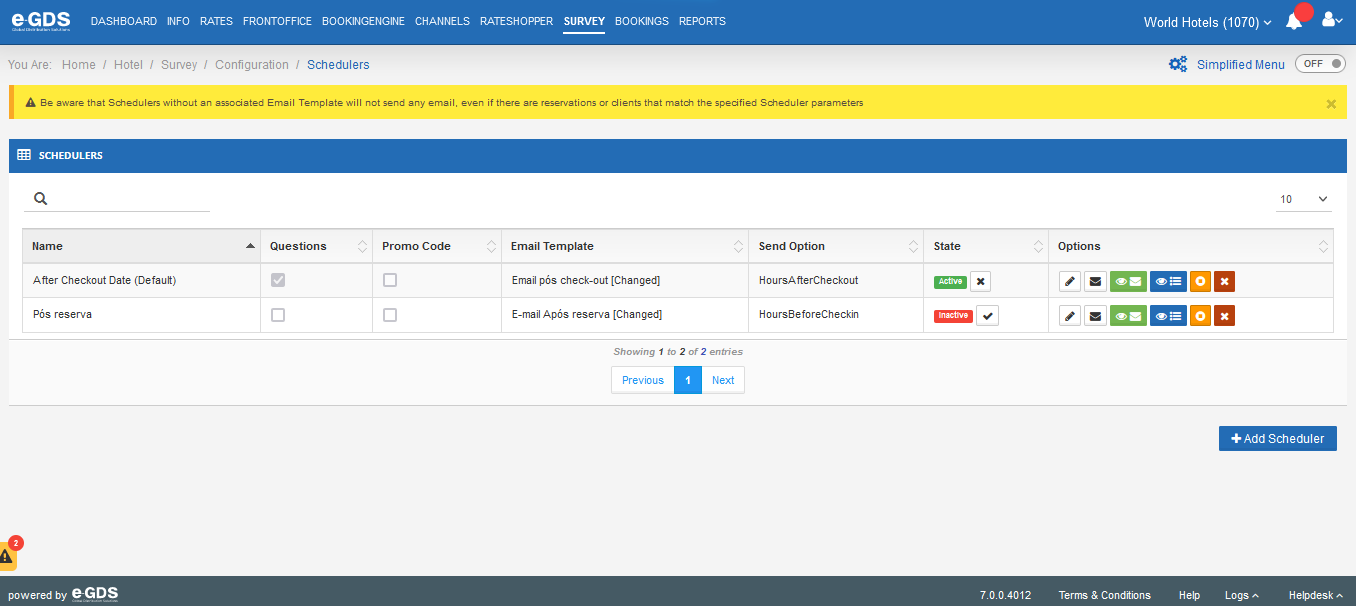
In the “Options” column the system presents a series of possibilities:
To send the test e-mail you just need to put in the box that is displayed the e-mail, first and last name and the country code and culture code. These last two are the acronyms of the language you want to test (PT – Portuguese; EN English…)
To create a new e-mail to be sent, you should select the “+Add Scheduler” in the lower right corner. The system will display the editing page for sending e-mails.
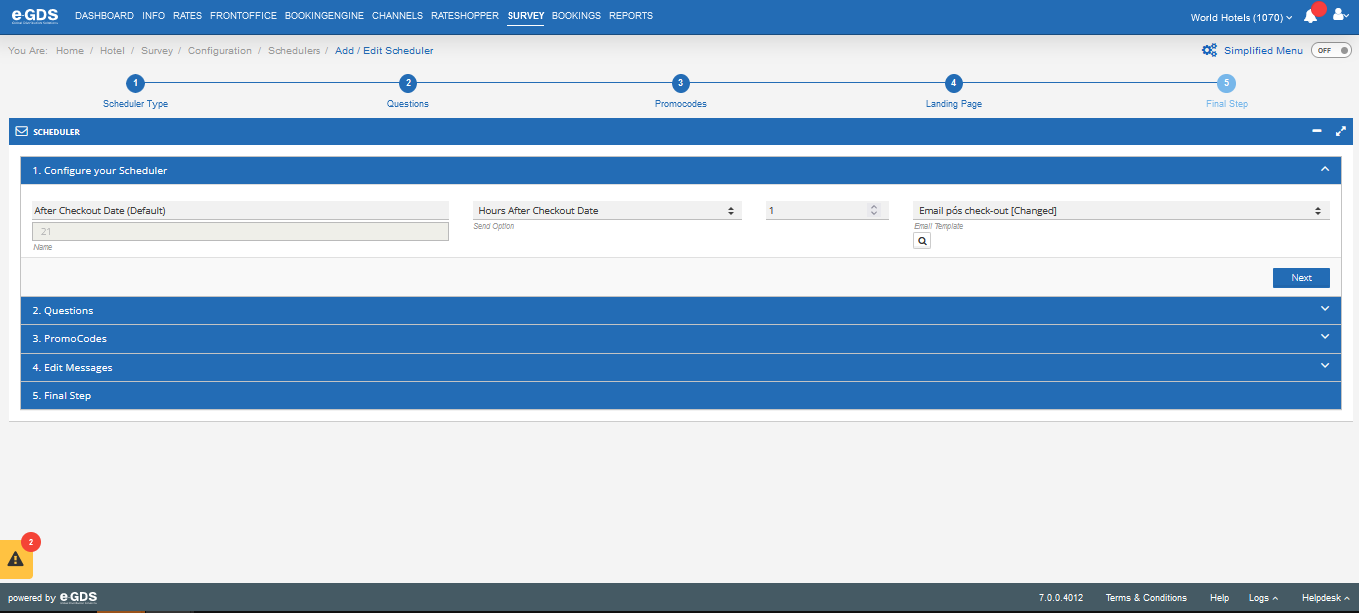
After selecting the sending option, you must put what time from check-in (when related to check-in) or according to check-out, the email should be sent.
For example, if you want to send an email before check-out, if you put 2 hours, the system will send 2 hours before the time parameterized as check-out in the menu Hotel > Info.
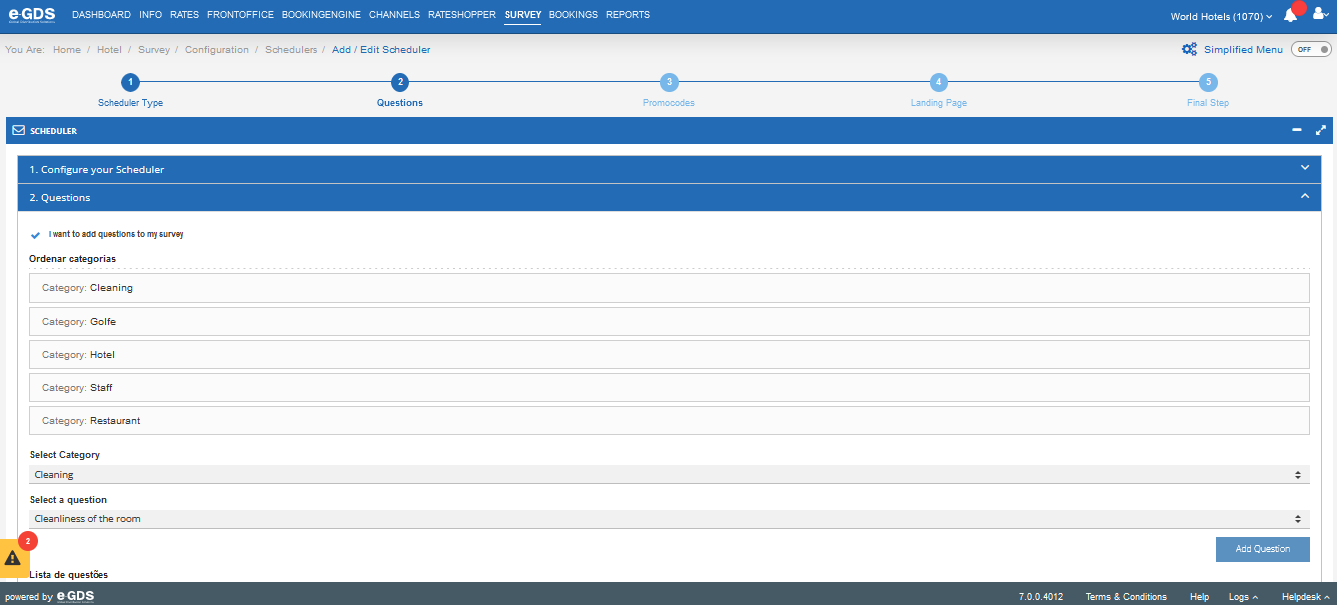
In step 2, if it is an e-mail after check-out, enter the questions you want online. In the other emails you must select “next”.
To add the questions to the survey, select in this step “I want to add questions to my survey”. The system will present you with the already created categories as well as the questions.
Here in the desired order select the category followed by the question and repeat the process until you have all questions aggregated in this area.
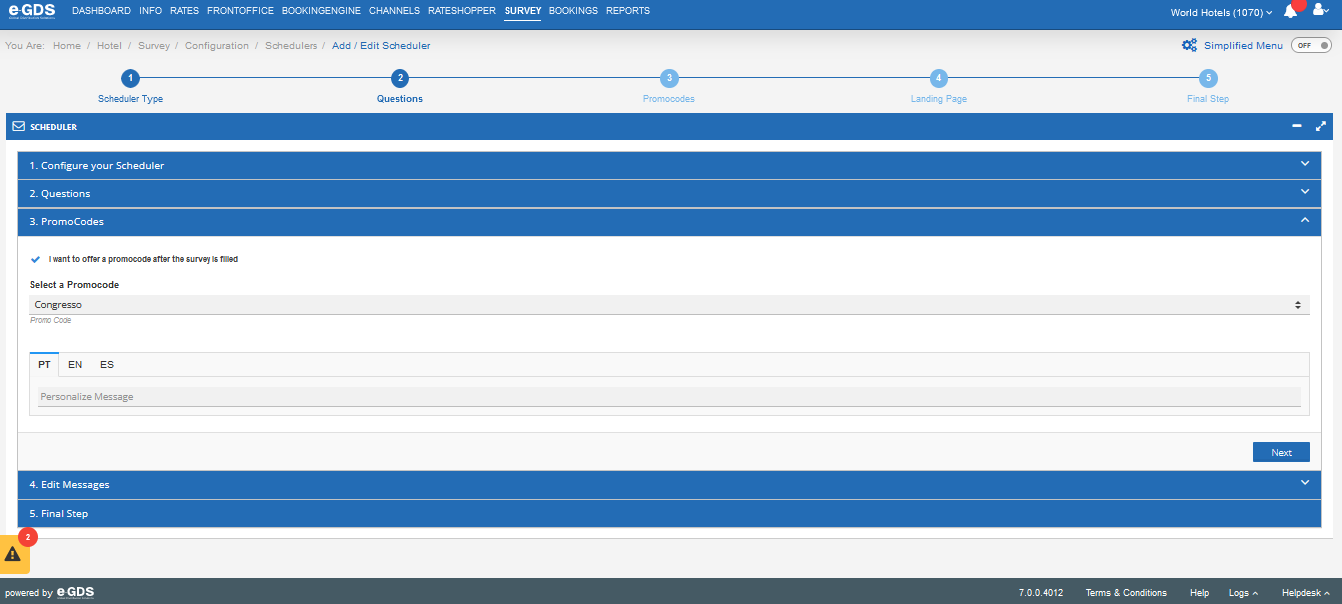
3. You can add promotional codes to the email that will be sent to your guests. To add it, select “I want to offer a promocode after the survey is filled”.
In this field you choose the promo code that will be sent and associate a personalized message.
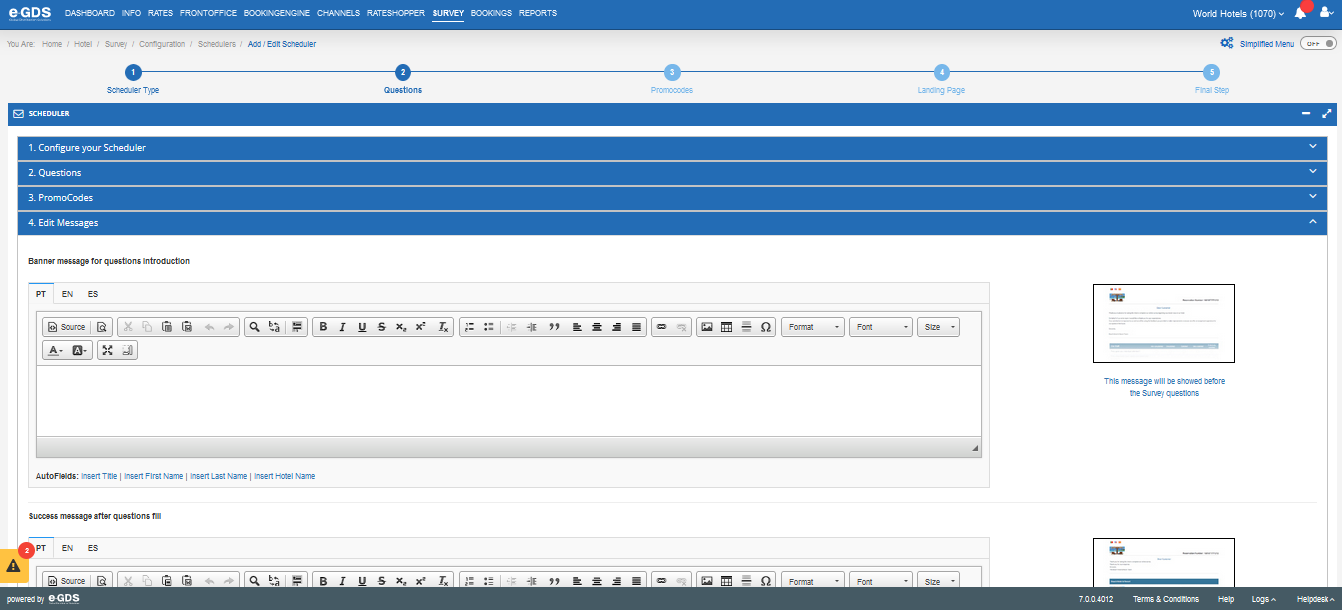
4. e-GDS Survey also allows you to modify messagesalready created by the system in this menu.
If you wish, you can write an introduction message in the first field before the guest starts the survey, in all languages, and you can also customize the success message after the answer is submitted.
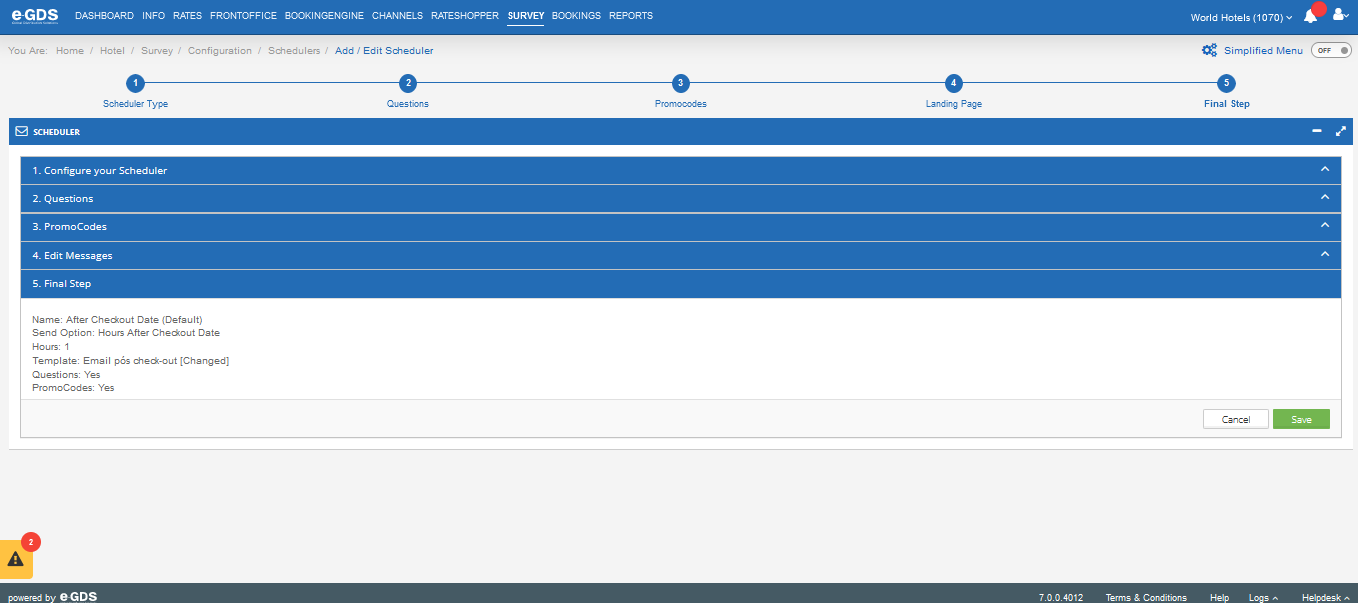
5. The last step is a summary of what you have selected in the last 4 steps so that you can see if the submission will have all the necessary components
Questions
My Question